Introduction
For homeowners seeking to revitalize their outdoor spaces, fence staining and sealing are essential practices that transform wooden fences from worn to vibrant. This comprehensive guide delves into the art of maintaining and enhancing your fence’s aesthetic appeal and longevity. From understanding the benefits of staining to choosing the perfect color, applying stains effectively, and securing protection through sealing, we explore each step thoroughly. By following these guidelines, you’ll ensure your wooden fence not only looks its best but also stands the test of time.
- Understanding Fence Staining: Benefits and Types
- Preparing Your Wooden Fence for Staining
- Choosing the Right Stain: Color and Finish
- Applying Stain: Techniques and Tools
- Sealing for Protection: Importance and Methods
- Maintenance Tips for Long-Lasting Results
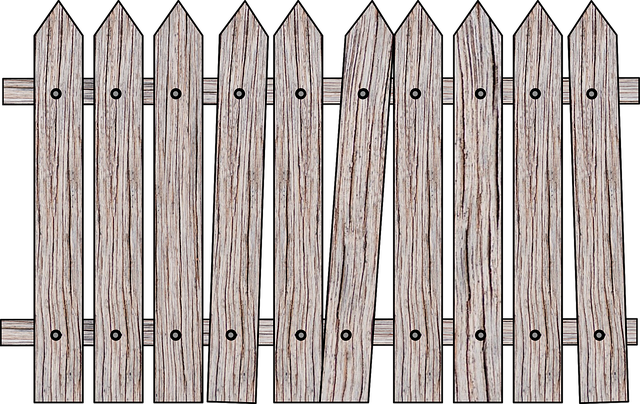
Understanding Fence Staining: Benefits and Types
Fence staining is more than just applying paint; it’s a process designed to protect and enhance your wooden fence’s appearance and longevity. The primary benefits include increased aesthetics, improved weather resistance, and extended lifespan of the wood. Staining creates a barrier between the fence’s surface and environmental elements like sun, rain, and UV rays, preventing rot, fading, and cracking.
There are various types of fence staining solutions available, each with unique features. Water-based stains offer easy application and minimal odor, while oil-based options provide deeper coloration and superior water repellency. Solid color stains give a uniform look, whereas transparent or semi-transparent formulas highlight the natural grain of the wood. Choosing the right type depends on your desired outcome, climate conditions, and maintenance expectations.
Preparing Your Wooden Fence for Staining
Before applying any stain or sealer, preparing your wooden fence is a crucial step. Start by cleaning the fence thoroughly to remove any dirt, dust, mildew, or mold. Use a pressure washer or a stiff brush and mild detergent for this process. Ensure that all surfaces are dry before proceeding.
Next, sand the fence gently to smooth out any rough spots, splinters, or old finish. This step helps the stain penetrate better and creates a more even appearance. Remove any loose debris generated during sanding with a broom or vacuum cleaner.
Choosing the Right Stain: Color and Finish
When choosing a fence stain, the first consideration is color. Wooden fences can range from natural wood tones to vibrant, bold shades, so selecting a stain that complements your aesthetic vision and the existing colors in your outdoor space is essential. Oil-based stains offer a wide range of color options and allow for more customization, while water-based stains tend to have fewer color choices but are easier to apply and clean up.
Finish is another crucial factor. Stains can provide either a transparent or semi-transparent finish, allowing the natural grain of the wood to show through, or an opaque finish that covers the wood completely. A transparent finish enhances the wood’s beauty while offering some protection, while an opaque finish offers more coverage and durability but obscures the wood’s natural look. Consider your preferences for aesthetics and the level of protection needed for your fence when making this decision.
Applying Stain: Techniques and Tools
Applying stain to your wooden fence is an art, requiring careful technique and the right tools for a professional finish. Start by ensuring your fence is clean and free from debris. Use a pressure washer or brush to remove any dirt, rust, or old finishes. Allow the wood to dry completely before applying stain, as moisture can prevent proper absorption.
For best results, use a wide-tipped brush or a roller with a handle for larger areas. Apply the stain in even strokes, working horizontally across the fence panels. Be sure to overlap each stroke slightly to create an even blend. Allow the stain to soak into the wood for the recommended time by the manufacturer, then wipe off any excess with a clean cloth.
Sealing for Protection: Importance and Methods
Sealing wooden fences is an essential step in maintaining their beauty and longevity, offering much-needed protection against the elements. This process creates a barrier that shields the wood from moisture, UV rays, and other environmental factors that can cause fading, cracking, and rot. Over time, sealing also helps to preserve the color and enhance the overall aesthetics of your fence.
There are various methods to seal a wooden fence, each with its own benefits. Water-based seals, for instance, are popular due to their low odor and quick drying time. They provide good protection against water damage but may require more frequent reapplication compared to oil-based seals. Oil-based seals, on the other hand, offer superior durability and resistance to UV rays, making them ideal for long-term protection. These seals can last up to several years with proper maintenance, ensuring your fence stays in top condition year-round.
Maintenance Tips for Long-Lasting Results
Regular maintenance is key to ensuring your fence staining and sealing project lasts for years to come. Start by cleaning the fence regularly to remove any dirt, mildew, or mold buildup. Use a soft-bristled brush and a mild detergent or a pressure washer for a more thorough clean. After cleaning, inspect the fence for any signs of damage, such as cracked paint or peeling sealant. Repair these issues promptly to prevent further deterioration.
To maintain the vibrant color and protect the wood, reapply a fresh coat of stain every 2-3 years, depending on factors like exposure to sunlight and weather conditions. Sealants should be renewed annually to create a protective barrier against moisture, UV rays, and other elements that can cause fading or rot. Regular maintenance not only keeps your fence looking its best but also extends the life of the finish, saving you time and money in the long run.